Open Dynamics Engine 入門
【3日目】デモ「カードタワー」
物理シミュレータ ODE(Open Dynamics Engine)の入門編の3日目です。 「【1日目】球の描画と衝突判定」、 「【2日目】オブジェクトのジョイント」で、 ODEの基本形が理解できたので、3日目以降はODEに付属のデモプログラムをいじって、より深く理解していきます。
デモ「カードタワー」
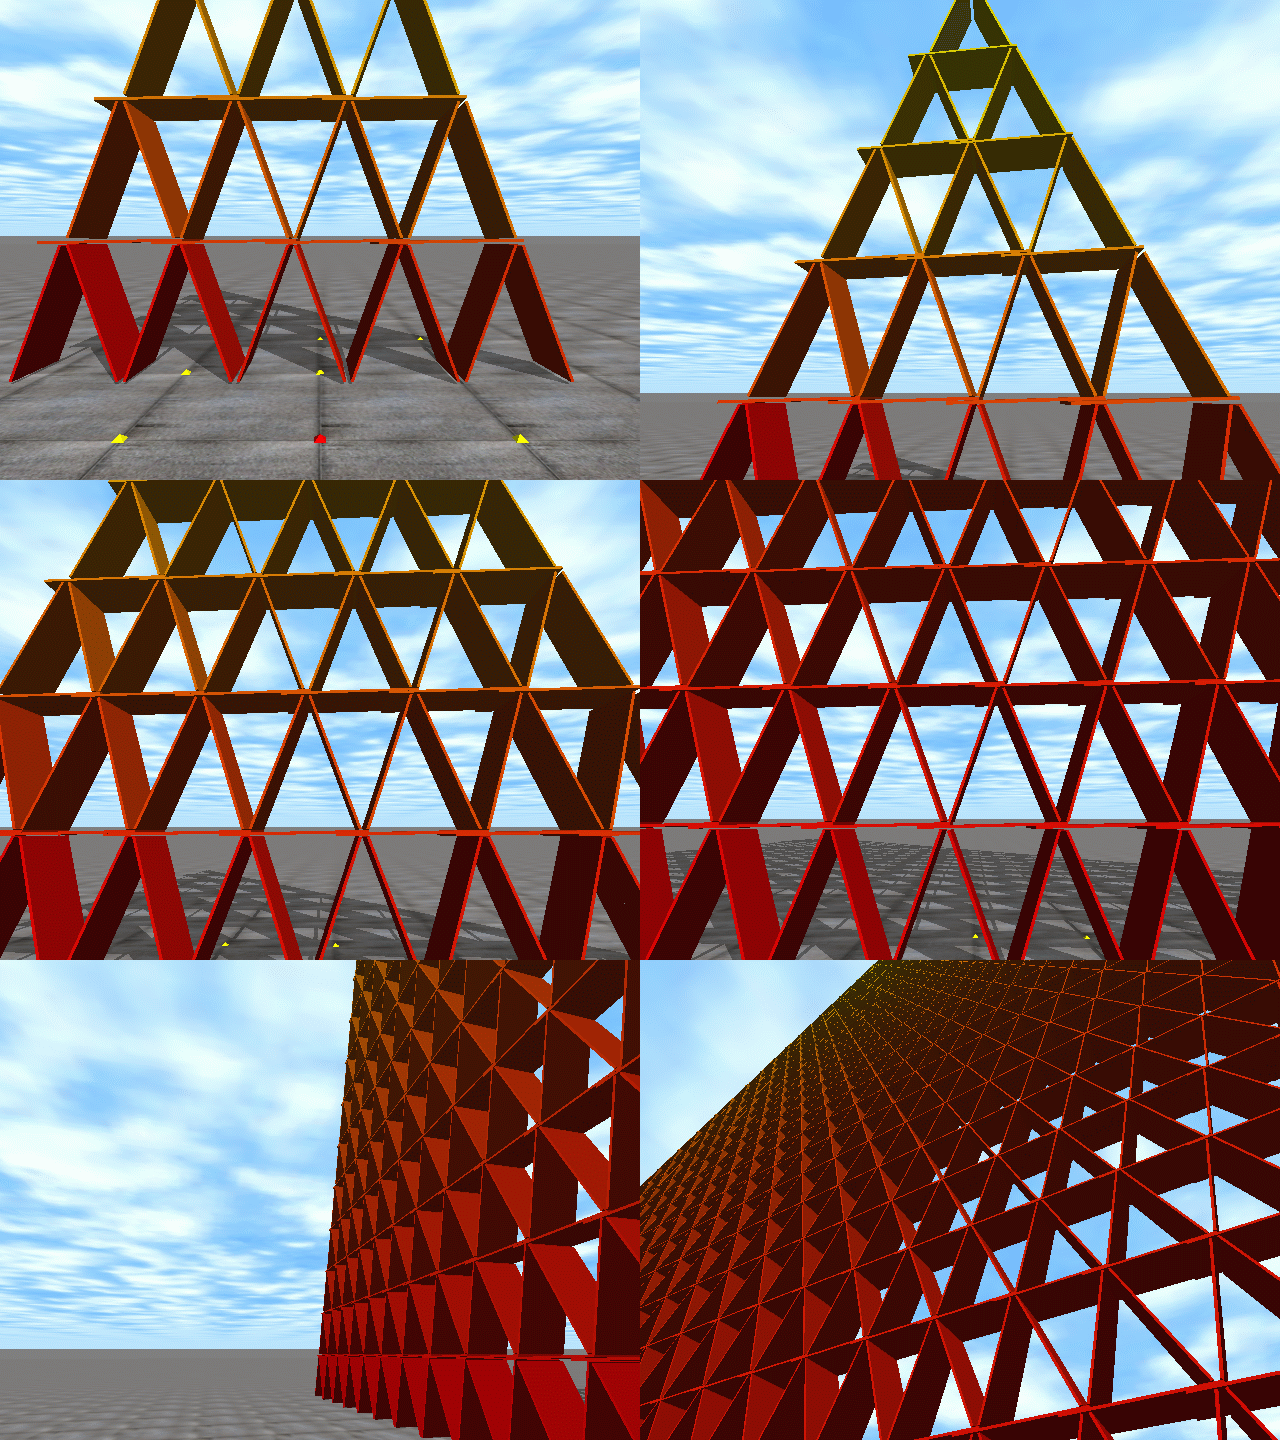
カード状のオブジェクトを組み立てて、タワーを作っています。
キーボード「-」「=」で押すと、タワーの階層を「減らす」「増やす」し、
「(スペース)」でタワーをリセットできます。
(※「カードタワー」という名前は、自分が勝手につけました。)

ちょっと改造
これまで学習したことを踏まえてちょっと改造します。
カード同士の摩擦係数(0.1)と地面との摩擦係数(5.0)を別々に指定します。
カード同士がすべるのでタワーは崩壊します。
ちなみにデフォルトでは摩擦係数は「5.0」です。
プログラムソース
以下のプログラムソースは、C:/ode-0.11.1/ode\demo/demo_cards.cpp を利用させていただいております。
#include <vector>
#include <ode/ode.h>
#include <drawstuff/drawstuff.h>

int WindowWidth  = 640; //ウィンドウの幅
int WindowHeight = 480; //ウィンドウの高さ


#ifndef DRAWSTUFF_TEXTURE_PATH
#define DRAWSTUFF_TEXTURE_PATH "C:/ode-0.11.1/drawstuff/textures"
#endif
#ifdef dDOUBLE
#define dsDrawBox dsDrawBoxD
#endif

static int levels = 10;
static int ncards = 0;

static dSpaceID space;
static dWorldID world;
static dJointGroupID contactgroup;
dGeomID ground;

struct Card {//カードの構造体
    dBodyID body;//動力学計算用ボディID
    dGeomID geom;//衝突計算用ジオメトリID
    static const dReal sides[3];//カードのサイズ(lx,ly,lz)

    Card()//カード構造体のメンバ関数
    {
        body = dBodyCreate(world); //ボディの生成
        geom = dCreateBox(space, sides[0], sides[1], sides[2]);//ジオメトリの生成
        dGeomSetBody(geom, body);  //ジオメトリとボディとを関連付ける
        dGeomSetData(geom, this);  //本オブジェクトのポインタをセットする
        dMass mass;                //質量クラスのオブジェクトの生成
        mass.setBox(1, sides[0], sides[1], sides[2]);//ボックス型の質量をセットする
        dBodySetMass(body, &mass); //ボディに質量をセットする
    }
    ~Card()
    {
        dBodyDestroy(body);
        dGeomDestroy(geom);
    }
    void draw() const //カード描画用のメンバ関数
    {
        dsDrawBox(dBodyGetPosition(body),
                  dBodyGetRotation(body), sides);
    }
};
static const dReal cwidth=.5, cthikness=.02, clength=1;      //カードの幅、厚み、長さの変数を定義
const dReal Card::sides[3] = { cwidth, cthikness, clength }; //カードのサイズをセット


std::vector<Card*> cards;//可変長配列としてカードオブジェクトを生成

int getncards(int levels)//カードの総数を計算する関数
{
    return (3*levels*levels + levels) / 2;
}

void place_cards()//カードを設置(再配置)する関数
{
    ncards = getncards(levels);
    // destroy removed cards (if any)
    int oldcards = cards.size();
    for (int i=ncards; i<oldcards; ++i)
        delete cards[i];  //メモリの開放
    cards.resize(ncards);
    // construct new cards (if any)
    for (int i=oldcards; i<ncards; ++i)
        cards[i] = new Card; //メモリの確保
    // for each level
    int c = 0;
    dMatrix3 right, left, hrot;//回転行列用の変数の定義
    dReal angle = 20*M_PI/180.;
    dRFromAxisAndAngle(right, 1, 0, 0, -angle); //右回転行列の取得
    dRFromAxisAndAngle(left, 1, 0, 0, angle);   //左回転行列の取得
    dRFromAxisAndAngle(hrot, 1, 0, 0, 91*M_PI/180.);

    dReal eps = 0.05; //余スペース
    dReal vstep = cos(angle)*clength + eps;//横方向への移動幅
    dReal hstep = sin(angle)*clength + eps;//縦方向への移動幅

    for (int lvl=0; lvl<levels; ++lvl) {//各階層ごとにカードを配置する
        // there are 3*(levels-lvl)-1 cards in each level, except last
        int n = (levels-lvl);
        dReal height = (lvl)*vstep + vstep/2;
        // inclined cards
        for (int i=0; i<2*n; ++i, ++c) {
            dBodySetPosition(cards[c]->body, //位置をセットするボディID
                    0,                       //x座標
                    -n*hstep + hstep*i,      //y座標
                    height                   //z座標
                    );
            if (i%2)
                dBodySetRotation(cards[c]->body, left);
            else
                dBodySetRotation(cards[c]->body, right);
        }

        if (n==1) // top of the house
            break;

        // horizontal cards
        for (int i=0; i<n-1; ++i, ++c) {
            dBodySetPosition(cards[c]->body,
                    0,
                    -(n-1 - (clength-hstep)/2)*hstep + 2*hstep*i,
                    height + vstep/2);
            dBodySetRotation(cards[c]->body, hrot);
        }
    }

}

void start()
{
  static float xyz[3] = {3.0,0.0,1.0}; //カメラの位置
  static float hpr[3] = {-180.0,0.0,0.0}; //カメラの方向
	//(z軸, y軸, x軸)における回転角度({0.0,0.0,0.0}でx軸方向を向いている)
	//上の場合は、y軸の方向を向いている
	dsSetViewpoint (xyz,hpr); //カメラの設定

    puts("Controls:");
    puts("   SPACE - reposition cards");
    puts("   -     - one less level");
    puts("   =     - one more level");
}

static void nearCallback (void *data, dGeomID o1, dGeomID o2)
{
    // exit without doing anything if the two bodies are connected by a joint
    dBodyID b1 = dGeomGetBody(o1);
    dBodyID b2 = dGeomGetBody(o2);

    const int MAX_CONTACTS = 8;
    dContact contact[MAX_CONTACTS];

    int numc = dCollide (o1, o2, MAX_CONTACTS,
                        &contact[0].geom,
                        sizeof(dContact));
    int isGround = ((ground == o1) || (ground == o2));
      for (int i=0; i<numc; i++) {
          contact[i].surface.mode = dContactApprox1;
          if(isGround) contact[i].surface.mu = 5;  //<-------------------地面との摩擦係数
          else         contact[i].surface.mu = 0.1;//<-------------------カード同士の摩擦係数
          dJointID c = dJointCreateContact (world, contactgroup, contact+i);
          dJointAttach (c, b1, b2);
      }
}
void simLoop(int pause)
{
    if (!pause) {
        dSpaceCollide (space, 0, &nearCallback);
        dWorldQuickStep(world, 0.01);
        dJointGroupEmpty(contactgroup);
    }

    dsSetColor (1,1,0);
    for (int i=0; i<ncards; ++i) {
        dsSetColor (1, dReal(i)/ncards, 0);
        cards[i]->draw();
    }
}

void command(int c)
{
    switch (c) {
        case '=':
            levels++;
            place_cards();
            break;
        case '-':
            levels--;
            if (levels <= 0)
                levels++;
            place_cards();
            break;
        case ' ':
            place_cards();
            break;
    }
}

int main(int argc, char **argv)
{
    dInitODE();

    // setup pointers to drawstuff callback functions
    dsFunctions fn;
    fn.version = DS_VERSION;
    fn.start = &start;
    fn.step = &simLoop;
    fn.command = &command;
    fn.stop = 0;
    fn.path_to_textures = DRAWSTUFF_TEXTURE_PATH;


    world = dWorldCreate();
    dWorldSetGravity(world, 0, 0, -0.5);
    dWorldSetQuickStepNumIterations(world, 50); // <-- increase for more stability

    space = dSimpleSpaceCreate(0);
    contactgroup = dJointGroupCreate(0);
    ground = dCreatePlane(space, 0, 0, 1, 0);

    place_cards();

    // run simulation
    dsSimulationLoop (argc,argv,WindowWidth, WindowHeight,&fn); //シミュレーション用の無限ループ

    levels = 0;
    place_cards();

    dJointGroupDestroy(contactgroup);
    dWorldDestroy(world);
    dSpaceDestroy(space);

    dCloseODE();
}
サンプルプログラムで理解したこと
次の2つのソースは同じ動作を示します。
//箱型質量オブジェクトの設定
dMass mass;                  //質量クラスのオブジェクトを生成
dReal lx=1.0, ly=1.0, lz=1.0;//辺の長さ
dReal density=1.0;           //密度

mass.setBox(weight, lx, ly, lz); //ボックス型の質量をセットする
dBodySetMass(body, &mass);   //ボディに質量をセットする
//箱型質量オブジェクトの設定
dMass mass;                  //質量クラスのオブジェクトを生成
dReal lx=1.0, ly=1.0, lz=1.0;//辺の長さ
dReal density=1.0;           //密度

dMassSetBox(&mass, weight, lx, ly, lz);//ボックス型の質量をセットする
dBodySetMass(body, &mass);   //ボディに質量をセットする
違うのは、質量クラスのオブジェクトである変数 mass に値を代入する時に、
上は、質量クラスのメンバ関数であるSet関数を利用し、
下は、ODEのAPIであるdBodySetMass関数を利用していることです。
VisualC++ではIntelliSense(インテリセンス)機能が利用できるため(VisualC++ 2010 Expressでは現在利用できないようです)、
「mass.」というようにオブジェクトに「.」をつけると、メンバ変数とメンバ関数の一覧が候補としてリストされます。
つまり、どんなメンバ変数やメンバ関数があるのかわかるため、何ができるのかが一目でわかります(メンバの名前を見ればなんとなく見当がつきます)。
たとえ、どんなAPIがあるのかがわからなくても、オブジェクトに「.」をつけるだけなので、非常に効率的にプログラミングすることができます。
APIは直感的で一見わかりやすいですが、メンバ関数を利用したほうがいいかもしれません。


